In this blog post, I'll walk you through the process of smoothly leveraging the Search SDK Starter Kit into a Sitecore Next.js solution.
Prerequisites
Before proceeding, ensure the following prerequisites are met:
- A Sitecore search account with initial configuration set up on Customer Engagement Console (CEC).
- Sitecore headless Next.js solution running on your local environment.
- Installation of necessary packages:
1npm install --save @sitecore-search/react
2npm install --save @sitecore-search/ui
3npm install --save styled-components
Configuration Steps
1. Create Source in CEC
Follow the steps outlined in the official documentation to create a source in CEC.
Ensure that suggestions blocks have a field named title_context_aware. Refer to the documentation for configuration details.
3. Setup Sorting Options
Configure sorting options to include featured_desc and featured_asc criteria as per the documentation.
Ensure that the following widgets are created beforehand:
- Search Results Page
- Search Results
- Preview Search
Code Leveraging Steps
- Download or clone the Sitecore Search SDK Starter Kit repository.
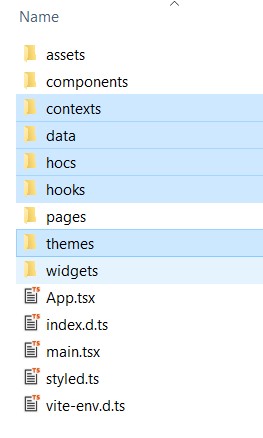
- Copy the following folders from the starter kit's
src folder to your Sitecore Next.js solution's src folder:
- Contexts
- Data
- Hocs
- Hooks
- Themes

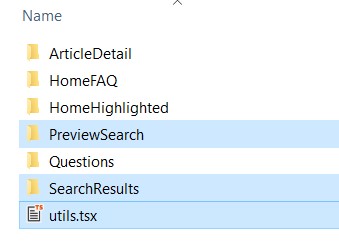
- Create a new folder named
widgets in your solution and copy the PreviewSearch and SearchResults folder along with Utils.tsx file from the starter kit.

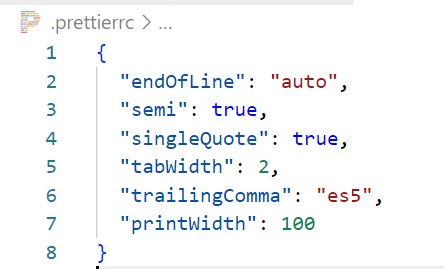
- We might face formatting issue in our copied tsx files, for this we can update
.prettierrc file to handle formatting issues, set the endOfLine value to auto

- Create environment variables in the
.env file:
1NEXT_PUBLIC_SEARCH_CUSTOMER_KEY=<customer-key>
2NEXT_PUBLIC_SEARCH_API_KEY=<api-key>
3NEXT_PUBLIC_SEARCH_ENV=prod
- Update the
_app.tsx file to integrate the widget provider.
Add necessary imports.
1import { LanguageContext } from 'src/contexts/languageContext';
2import useLanguage from 'src/hooks/useLanguage';
add following const in within the main function.
1const { language, setLanguage } = useLanguage();
Wrap language context and widget provider with <I18nProvider /> and Supply environment variables for customer key and API key, final outcome should look like as shown in the screenshot below:
1<LanguageContext.Provider value={{ language, setLanguage }}>
2  <WidgetsProvider
3    env={process.env.NEXT_PUBLIC_SEARCH_ENV as Environment}
4    customerKey={process.env.NEXT_PUBLIC_SEARCH_CUSTOMER_KEY}
5    apiKey={process.env.NEXT_PUBLIC_SEARCH_API_KEY}
6    publicSuffix={true}>
7      <I18nProvider lngDict={dictionary} locale={pageProps.locale}> </I18nProvider>
8  </WidgetsProvider>
9</LanguageContext.Provider>
-
Replace references to react-router-dom with @sitecore-jss/sitecore-jss-nextjs in Styled.ts file under SearchResults widget folder.
-
Replace useNavigate import from react-router-dom with next/router and fix all references accordingly, whereever it is being used.
-
Create a Search rendering in Sitecore and implement it in your Next.js solution.
- Create a
Search.tsx file under components/search folder.
- Call the Search results widget in the
Search.tsx file.
- Wrap the export with
withPageTracking hoc, this will enable tracking user analytics.
- Example implementation:
1import withPageTracking from 'src/hocs/withPageTracking';
2import SearchResults from 'src/widgets/SearchResults';
3
4const Search = (): JSX.Element => {
5  return <SearchResults key={'search'} rfkId="rfkid_7" defaultKeyphrase={''} />;
6};
7
8export default withPageTracking(Search);
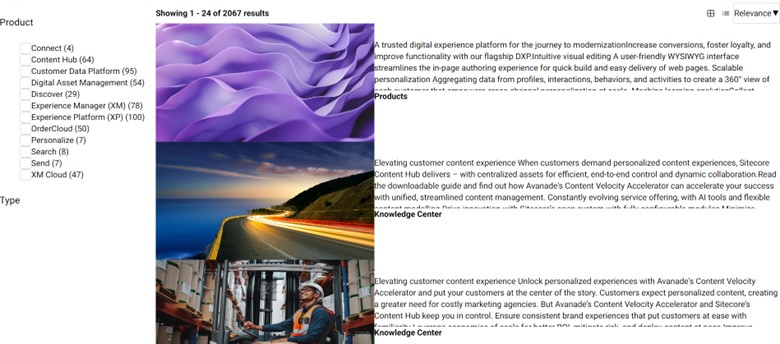
Now, you're ready to drop the search component on any page from the Experience Editor and enjoy the final outcome if the source and facets are configured properly in the CEC portal.

Conclusion
By following these steps, you can seamlessly leverage the Sitecore Search SDK Starter Kit into your Sitecore Next.js solution. With proper configuration and implementation, you can enhance search functionality and improve user experience, and update the styling of search components as per the site theme.
![Leveraging Sitecore Search SDK Starter Kit into Your Sitecore Next.js Solution [Part 2]](/_next/image?url=%2Fimages%2Fpost%2Fstarter-kit.png&w=2048&q=75)


